

How To Remove Rear Wiper Arm On Ford Explorer
Properly working windshield wipers are essential to safe driving. A dirty windshield tin drastically touch on your ability to safely drive your vehicle by making it hard to encounter obstacles in your path, and increasing glare from oncoming vehicle headlights if you are driving at night.
If your windshield wipers are leaving un-wiped spots or are streaking, fifty-fifty subsequently you take replaced the blades, there is a expert chance that the wiper artillery themselves could be the trouble. Wiper artillery can become bent due to corrosion. Regardless of the reason, if your wipers aren't working after changing the blades, information technology'due south time to switch out the wiper arms.
Windshield wipers use a couple of different technologies to go on your windshield sparkling clean. The wiper motor, which is an electric motor, uses a worm gear, that provides the ability to move the wipers. The wiper linkage converts the rotational output of the wiper motor into the back and forth movement of the wiper blades.
Wiper arms are usually bent due to vandalism and one time they are bent, they are nigh incommunicable to correctly straighten out; the artillery will have to exist replaced.
Wiper bract artillery come in a few different styles: bolt-on, clip-on, or push-on.
Regardless of which type you have, replacing a wiper arm is not a complicated process and should only take an an 60 minutes or and so. Only, if you're uncomfortable doing the work or only don't take fourth dimension, our experienced mobile mechanics at YourMechanic will exist happy to come up to your habitation or office to perform an windshield wiper inspection and repair.
Method one of iv: Bolt-on wiper artillery
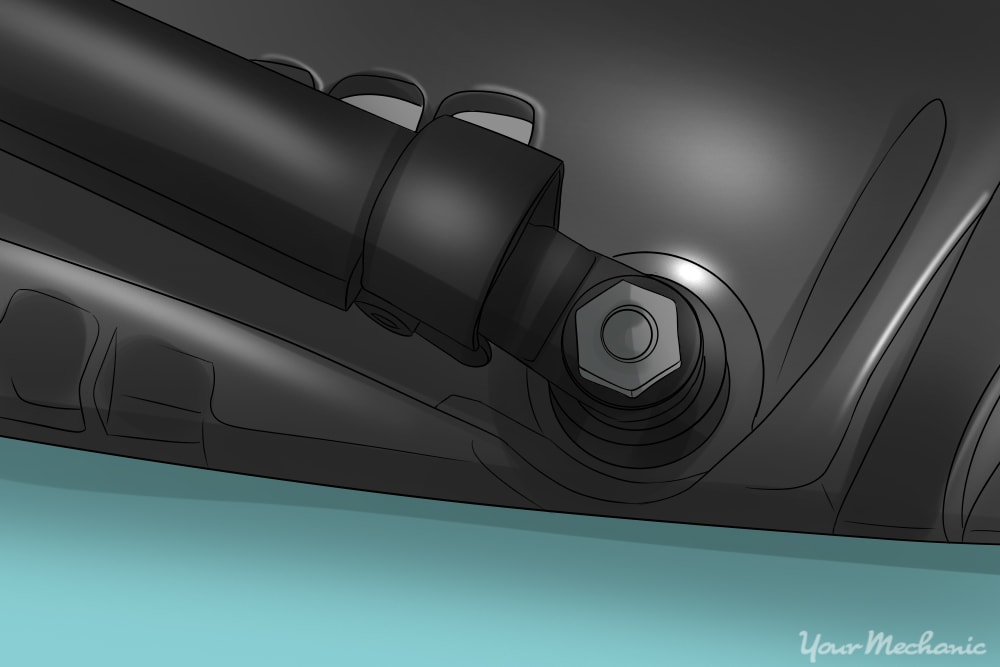
Decide whether you lot have a commodities-on wiper arm by post-obit the wiper arm from the wiper bract to the base of operations where it is attached. Yous may have to open the hood. Bolt-on wiper arms are attached to the wiper post past a nut. The nut is usually concealed under a plastic encompass that must be removed or popped open.
Materials Needed
- Flathead screwdriver
- Socket set up
- Wax crayon
Step i: Plough the wipers on and stop them mid-mode upward the windshield. Mark their location with the wax crayon.
Step two: Remove the plastic encompass over the nut holding the wiper arm onto the mail service. If possible, simply twist the comprehend off.
If information technology resists, you lot may need to use the flathead screwdriver to pry it off. In one case the comprehend is removed, place information technology in a safe location.
Step 3: Select the correct socket size for the nut on your vehicle. Then place the socket in the ratchet.
Utilise a ratchet extender if necessary to become the proper leverage on the nut.
Step 4: Find the optimum leverage point. Decide the best place to stand to get access to the nut and the proper leverage.
You may take to get nether the hood or lean over the windshield.
- Warning: Getting the proper leverage on the nut is primal, so you don't end up stripping the nut or damaging the splined wiper blade shaft. Test your leverage on the nut before applying total force.
Step v: Verify that the ratchet is set to counter-clockwise (CCW). This will allow the nut to be loosened.
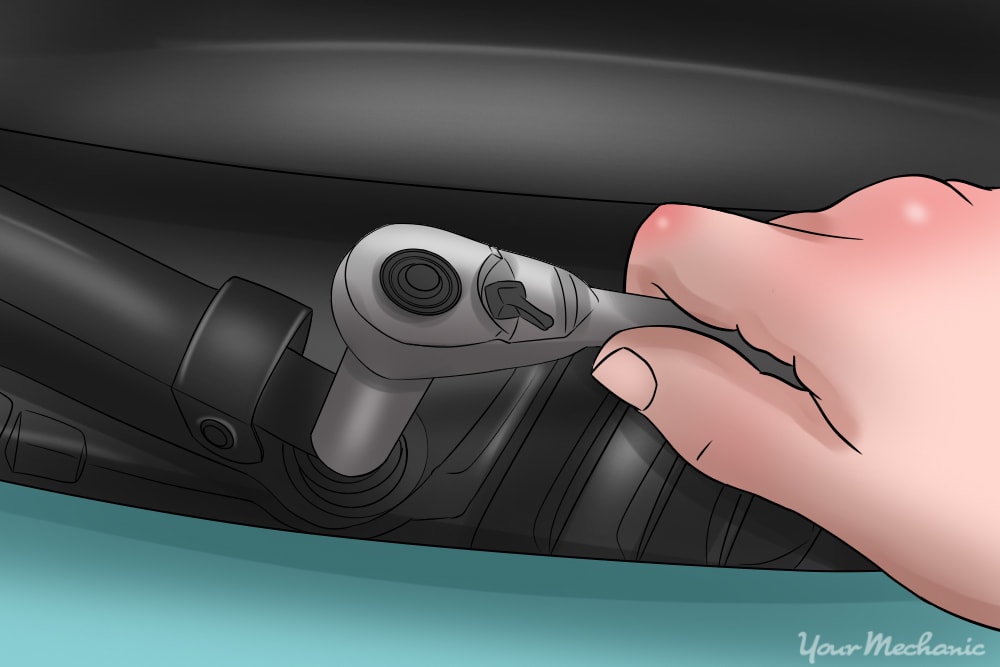
Step 6: Loosen the nut by putting the ratchet over the nut and turning the ratchet. The wiper arm should be stabilized with your other manus to prevent damage to the linkage and blade shaft.
Pace 7: Remove the nut. Later on the nut is sufficiently loosened, remove the ratchet and spin the nut off by manus.
The nut should exist placed somewhere safe then information technology tin exist reused to attach the new wiper arm.
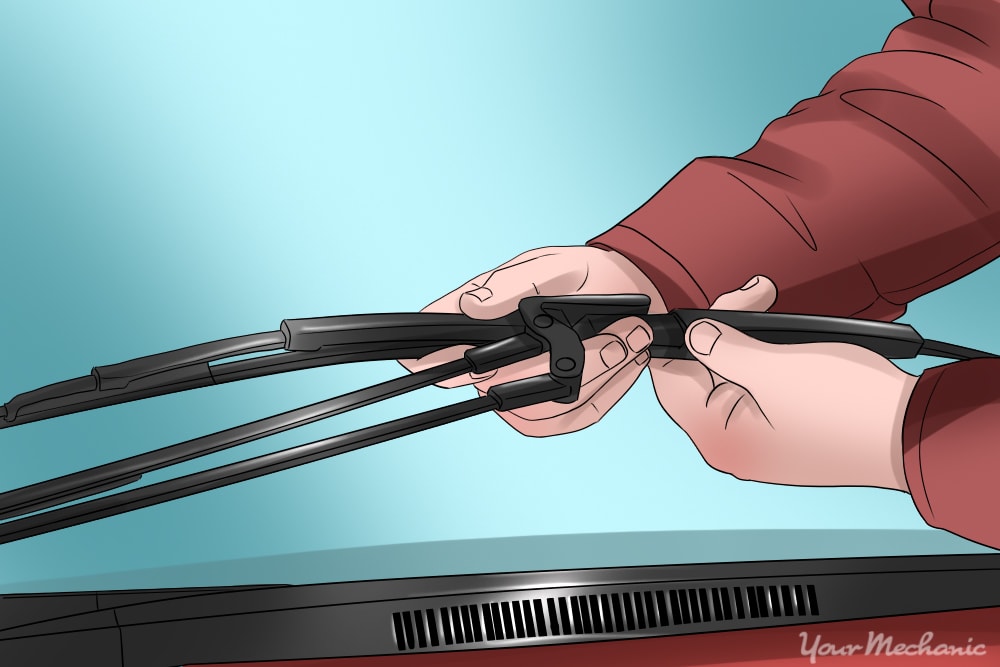
Step eight: Remove the wiper blade arm. Lift the wiper bract arm upwards from the windshield, and take hold of the wiper blade with i hand and the wiper arm virtually the bolt with the other hand.
Gently tug the wiper blade arm back and along until information technology comes off of the drive post.
Method 2 of iv: Clip-on wiper arms
Make up one's mind whether y'all are removing a prune-on wiper arm by following the wiper arm from the wiper blade to the base where it is attached. It's possible that yous will have to open the hood. Prune-on wiper arms accept a small tab at the base of the wiper arm.
Textile Needed
- Flathead screwdriver
Pace 1: Turn the wipers on and stop them mid-way upward the windshield. Marker their location with the wax crayon.
Step two: Inspect the base of the wiper arm and look for a slide lock, flange or lip. Identify the blazon of clip your particular wiper arm uses.
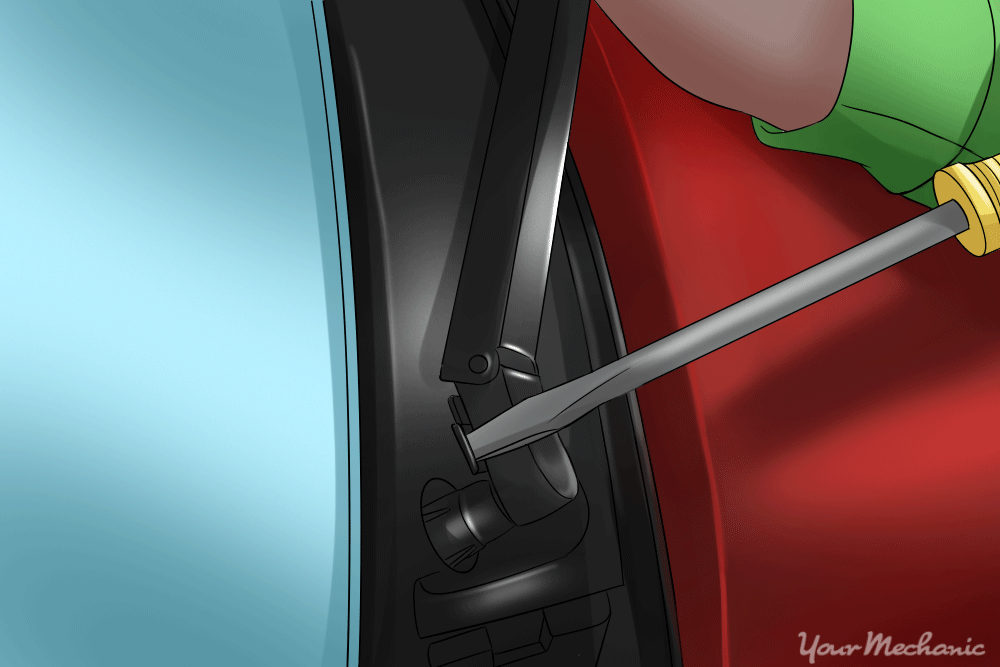
Step iii: Pivot the wiper arm away from the windshield. Then try to pry open the slide lock or flange.
You may be able to do this with your fingernail. If information technology is rusted or stuck, utilize a flathead screwdriver to pry information technology open.
- Alarm: Y'all may want to place a piece of cardboard or a rag over the stop of your car before attempting to pry it open with a screwdriver. If the screwdriver slips, it could damage your vehicle.
Stride 4: Remove the wiper arm. Depending on the blazon of clip on wiper arm you have, either:
-
Release the slide lock on the wiper arm and stone the wiper arm dorsum and along, using both easily to stabilize the arm, until information technology comes off of the wiper post; or
-
Use the screwdriver to pry open up up the space in the flange until it is roughly ¼" to 3/viii" wide. In one case it is loose enough, apply both hands to stabilize the wiper arm while twisting it until it slips off of the wiper mail service.
Method three of 4:Push-on wiper arms
Some wiper arm do not prune or commodities on, but are just pushed onto the wiper arm post.
Materials Needed
- Finishing nail or other narrow metal material that will fit in the hinge holes on the wiper arm
Step 1: Turn the wipers on and stop them mid-manner upward the windshield. Mark their location with the wax crayon.
Footstep 2: Locate the hinge on the wiper arm. It will exist virtually the signal where the wiper arm attaches.
Then locate the hole in the wiper arm, which is near the hinge pin.
Step 3: Lift the wiper arm off the windshield. Insert the finish boom or other metal object through the pigsty in the wiper arm.
Stride 4: Let the wiper arm go. Information technology should now stand up upwards away from the windshield with the nail stopping information technology from falling back.
Step 5: Utilize both hands to grasp the wiper arm. Rock it back and forth while pulling upward on it until the wiper arm slides off the wiper arm post.
Method iv of 4: Installing a new wiper arm
Materials Needed
- New wiper arm
- Oil or WD-40
- Rubber mallet
- Steel wool or wire brush
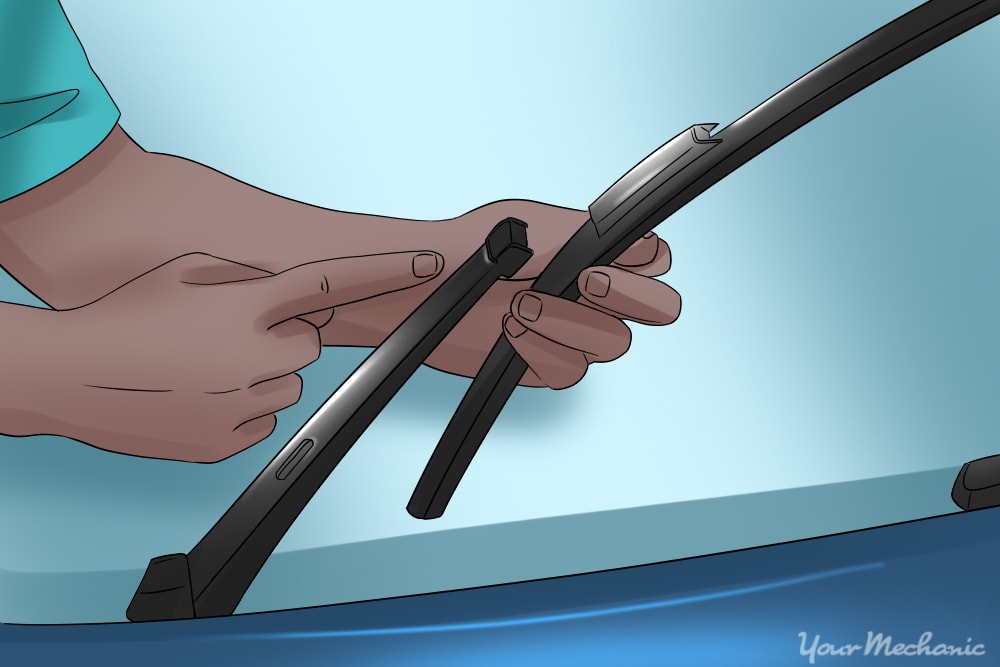
Before first installation, make certain the new wiper arm is the same type every bit the i that you lot removed.
Step ane: Make clean the wiper arm post with the steel wool or wire brush. Clean the ridges on the splined wiper blade shaft.
A dirty wiper blade mail service can atomic number 82 to the failure of the wiper arm.
Step 2: Lubricate the wiper postal service. Employ a couple of drops of oil or a light blanket of WD-forty to the wiper blade post; this will brand installing the wiper arm easier.
Step iii: Install the replacement arm. Go in the reverse lodge of the above procedures, aligning the new wiper bract arm on the windshield with the wax crayon marking that you fabricated on the windshield before removing the original wiper blade arm.
-
Bolt-on: Utilize 1 hand to stabilize the new wiper arm while tightening the commodities to ensure the new wiper arm is not bent.
-
Prune-on: Seat the base of the wiper arm on the wiper blade post and squeeze the flange around the base of the post until the prune locks.
-
Push-on: Using one hand to stabilize the wiper arm button the end of the wiper arm down on the wiper arm post. Use a condom mallet if necessary to get it securely on the postal service.
-
Note: Information technology may require numerous attempts to align the new wiper blade arm in the same position as the old i, due to the fact that the knurling pattern on the wiper arm post will prevent your from turning the arm to align it properly. It will be necessary to lift it off, adjust the position slightly and place it dorsum on the wiper arm mail service.
Step iv: Turn the motorcar on and examination the new wiper arm. Make sure it follows the aforementioned arc as the previous one.
While replacing the wiper arm is fairly straightforward and only requires basic tools, it tin can be tricky if yous are not comfortable working on a vehicle. If you have whatever doubts or simply don't have fourth dimension to do the piece of work, do not hesitate to contact i of our experienced mobile mechanics at YourMechanic to come to your home or office to perform a windshield wiper inspection and replacement.
The statements expressed above are only for informational purposes and should be independently verified. Please see our terms of service for more details

How To Remove Rear Wiper Arm On Ford Explorer,
Source: https://www.yourmechanic.com/article/how-to-replace-a-windshield-wiper-arm-by-mark-vallet
Posted by: sommerfieldcliveher.blogspot.com
0 Response to "How To Remove Rear Wiper Arm On Ford Explorer"
Post a Comment